Adding a Leave a Message Gateway
There are two ways to add a new leave a message gateway:
- Copy an existing leave a message gateway
- Add a new message gateway from scratch
Note: For instructions on copying a message gateway, see Copying a Message Gateway.
Configuring a Leave a Message Gateway from Scratch
To configure a new leave a message gateway, follow these steps:
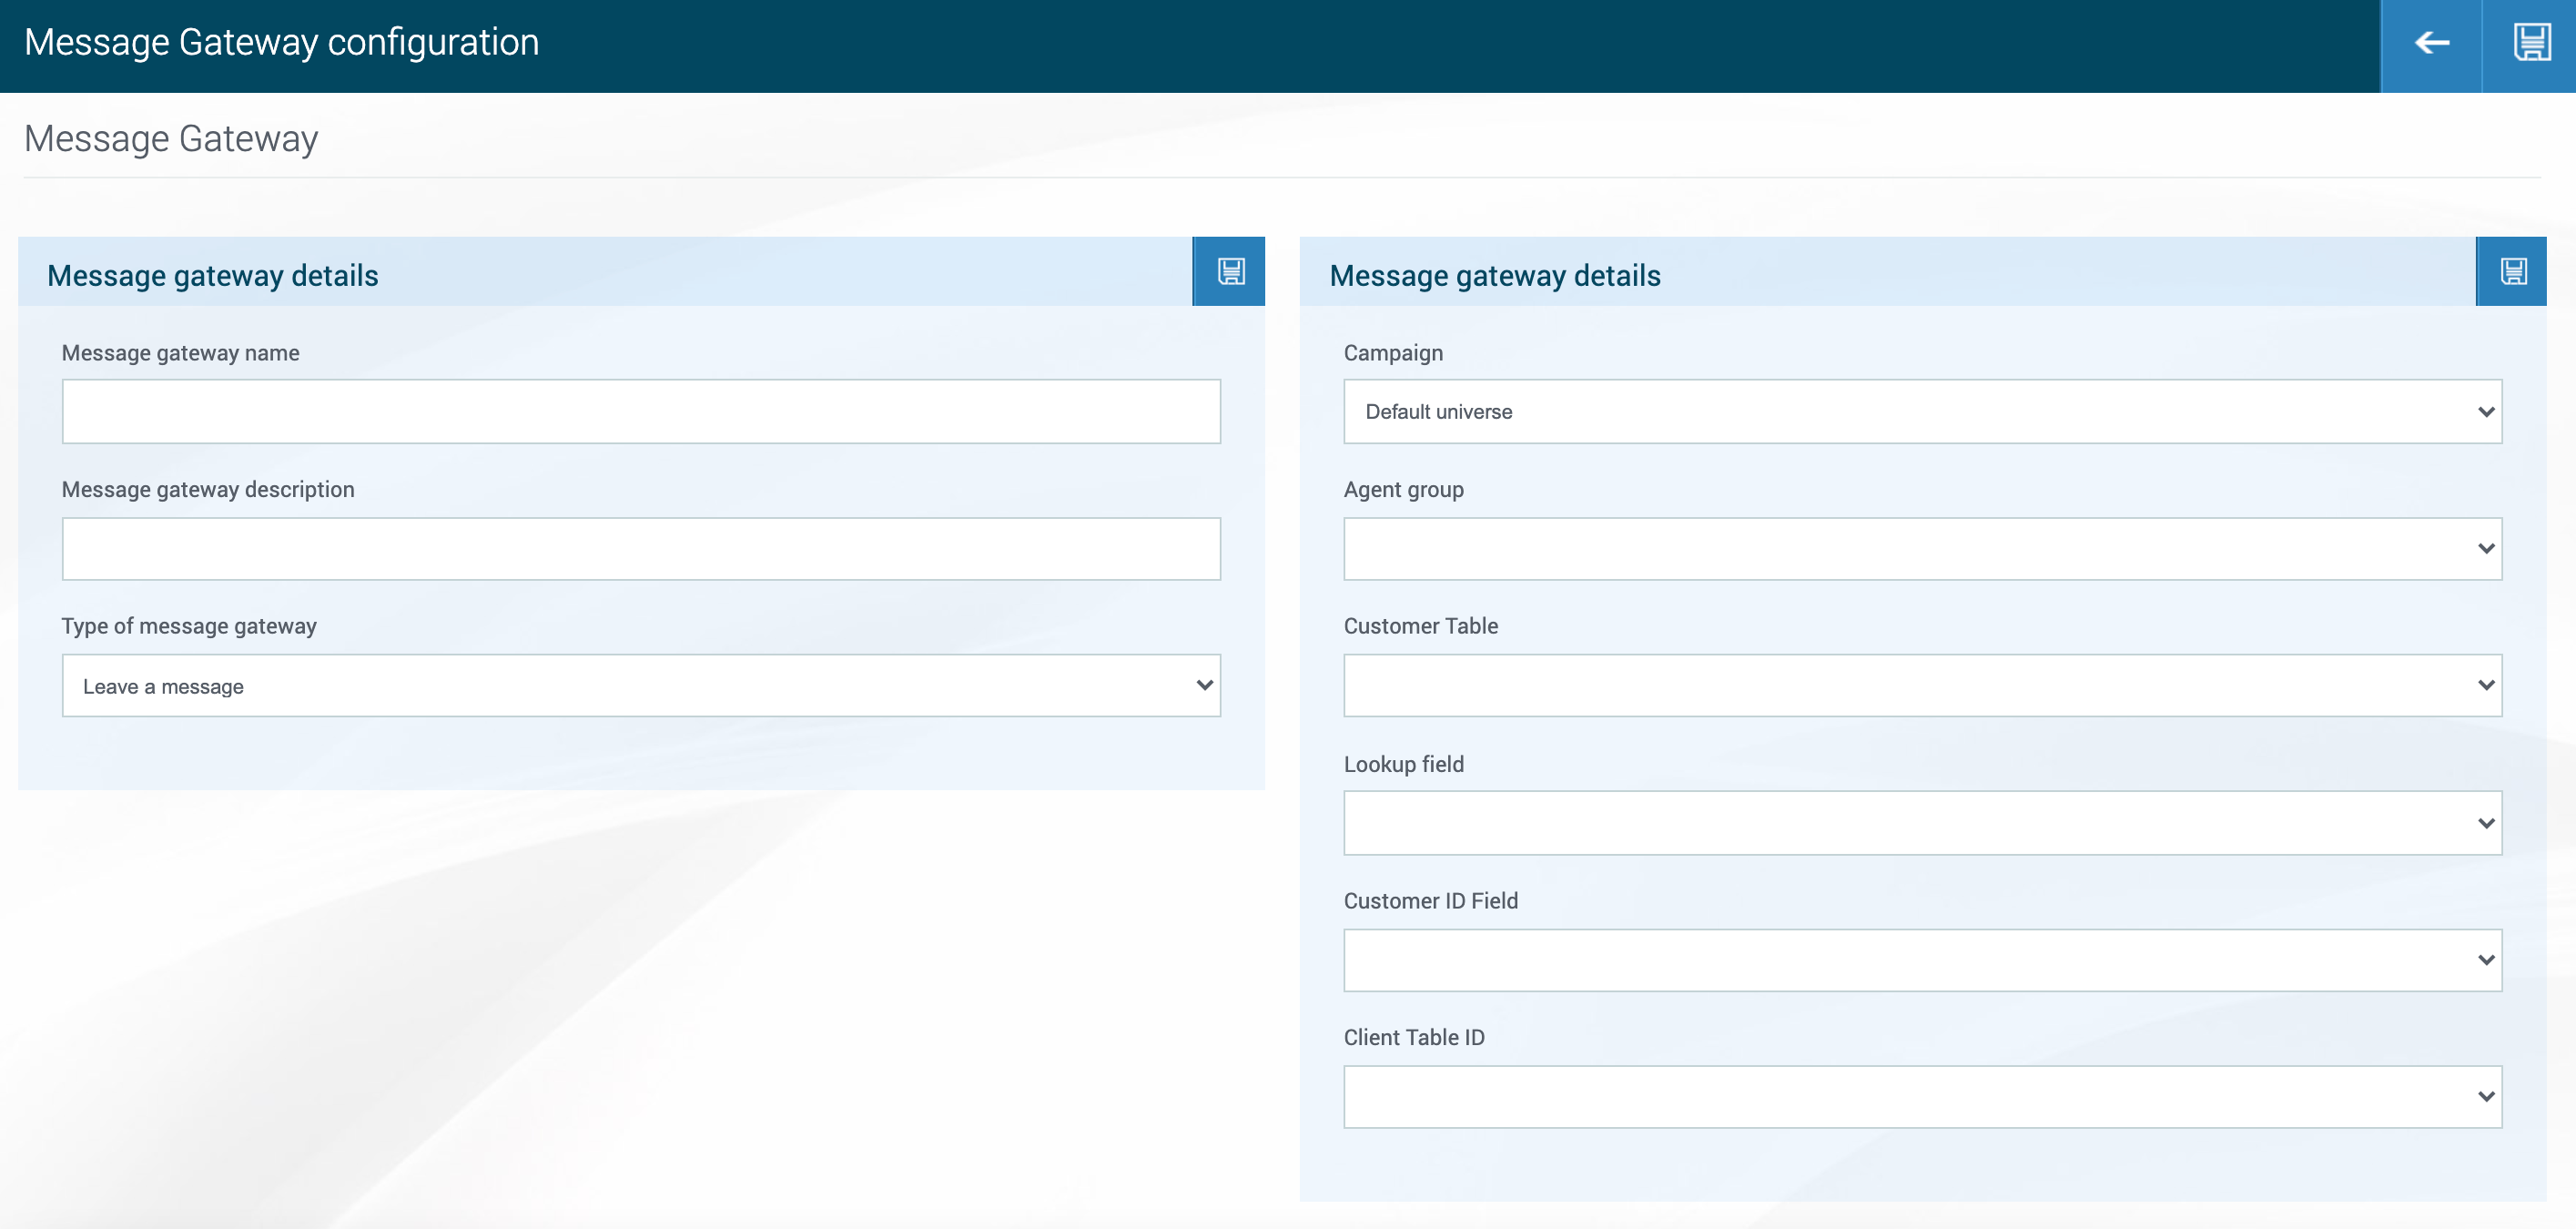
STEP 1
- In the Type of message gateway dropdown, select Leave a message. Additional boxes relevant to this type of message gateway appear.
-
In the Message gateway name box, type a name for your leave a message gateway.
Note: This is for your reference only. The name will not be shown to customers or agents.
-
In the Message gateway description box, type a description of your leave a message gateway.
Note: This is for your reference only. The description will not be shown to customers or agents.
STEP 2
- In the Campaign dropdown, select the universe to which this gateway should be added.
- In the Agent group dropdown, select the agent group that will deal with these left messages.
- In the Customer Table dropdown, select the table that contains your customers’ details, specifically your customers’ email addresses.
-
In the Lookup field dropdown, select the column in your customer details table that contains customers’ email addresses.
Note: When a customer leaves a message, Syntelate XA matches their email address against this field in your customer details table. If a match is not found, Syntelate XA creates a new record in your customer details table.
- In the Customer ID Field dropdown, select the column in your customer details table that contains unique customer IDs that Syntelate XA should use to match against the
-
In the Client Table ID dropdown, select the column in the INTERACTION_X table that Syntelate XA should match against the Customer ID Field.
Note: Your customer details table contains one record per customer. The INTERACTION_X table, on the other hand, contains one record per customer interaction (in other words, it contains one record for every web chat, phone call, and so on).
Both tables must contain a column for a unique customer ID. This is the Customer ID Field in your customer details table and the Client Table ID field in the INTERACTION_X table. Syntelate XA uses this unique ID to link each customer interaction (such as a web chat or phone call) to one of your customers.
- Click
 .
.
What’s Next?
You’ve now added a basic leave a message gateway, but there’s still more to do! See the following tasks:
- Setting the Fields to Be Written to the Interaction Table
- Setting the Fields for New Customers
- Styling Leave a Message
- Configuring the subject of the email record: see Setting the Chat Messages
- Manually Activating Leave a Message
- Making a Message Gateway Active/Dormant