Styling Your Web Chat
Syntelate Studio offers lots of options for styling how your web chat will look on your website.
Setting the Position
You can configure your web chat to appear in one of the following positions on your website:
- Left-hand side
- Bottom left
- Bottom right
- Right-hand side
To set the web chat position, follow these steps:
- From the Web Chat configuration home page, click VIEW for the web chat that you want to edit. The Web Chat page is shown.
- In the Web Chat details section, click
 . The fields are unlocked for editing.
 - In the Position dropdown, select the position for the web chat.
- Click
 .
.
Setting the Title
You can set the title of your web chat.
EXAMPLE
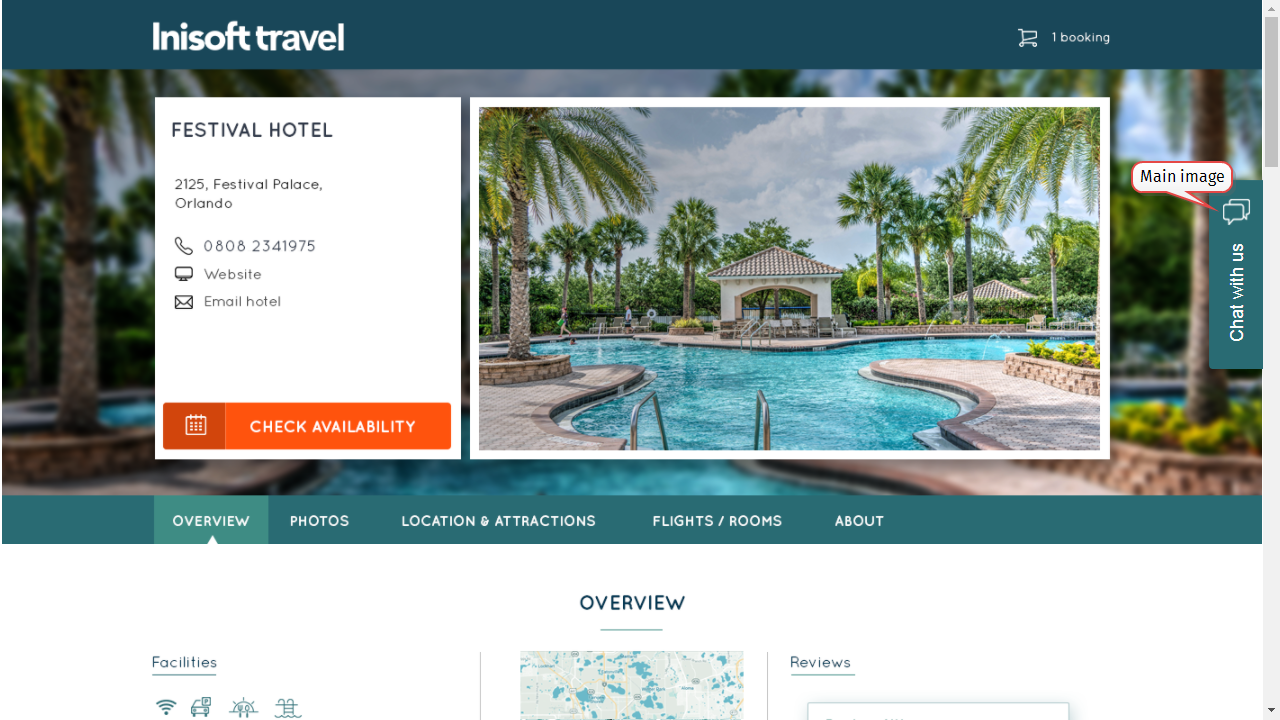
Inisoft Travel have set the title of their web chat to Chat with us. The title is shown on the button that the customer clicks to start a chat.
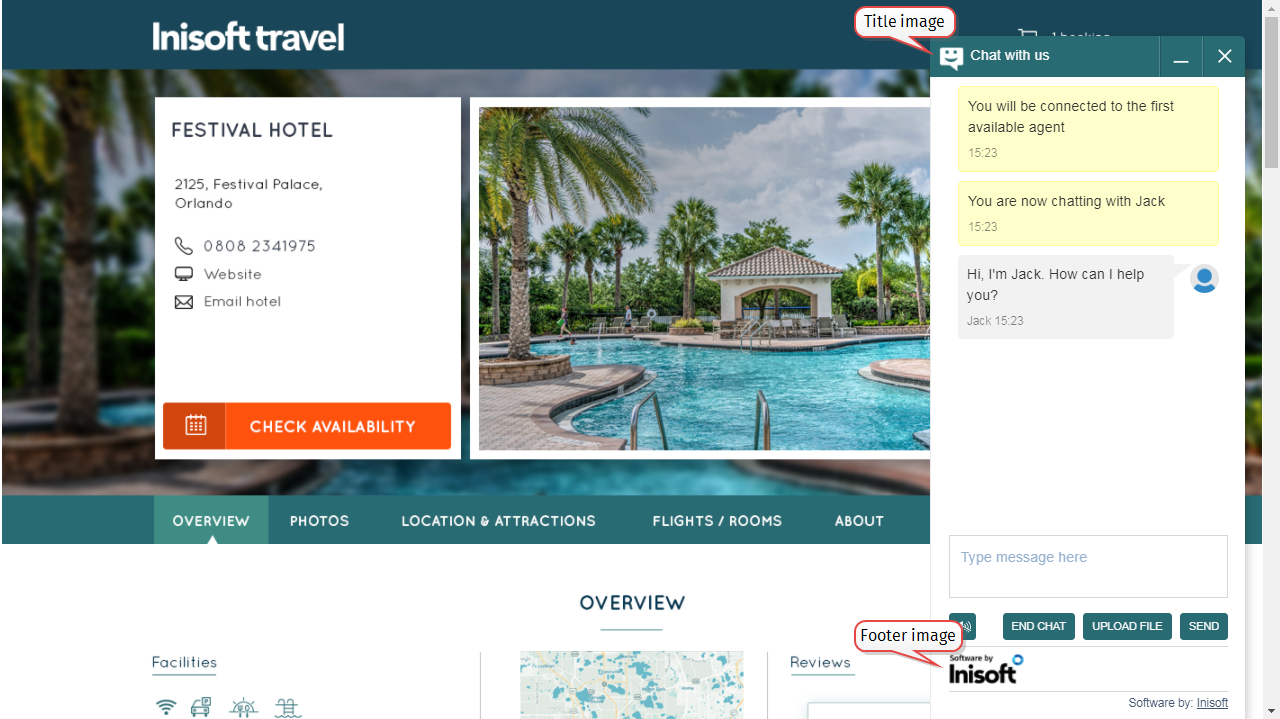
During a web chat, the title is also displayed at the top.
To set the web chat title, follow these steps:
- From the Web Chat configuration home page, click VIEW for the web chat that you want to edit. The Web Chat page is shown.
- In the “Let’s Chat” options section, click
 . The fields are unlocked for editing.
 - In the Title text box, type a title for your web chat.
- Click
 .
.
Setting the Images
Syntelate Studio lets you set three different images for your web chat:
- Main image
- Title image
- Footer image
Note: If you wish, you can also set for no images to be used.
To set the web chat images, follow these steps:
- From the Web Chat configuration home page, click VIEW for the web chat that you want to edit. The Web Chat page is shown.
- In the Web Chat details section, click
 . The fields are unlocked for editing.
 - Under Main image source, click No image (if you do not want to use an image), Predefined image (to select one of the default images), or Uploaded image (to upload a new image).
- If you selected Predefined image:
- Under Select an image, click the image that you want to use.
In the Main image position dropdown, select whether the image should be left, center, or right aligned.
Note: The Main image position dropdown is only visible for web chats with a position of bottom left or bottom right.
- If you selected Uploaded image:
- Click BROWSE FILE to open the Open dialog box.
Select your image, and then click Open.
Note: Your image must have one of the following file name extensions: .gif, .jpg, .jpeg, .png.
For best results, use an image that is 30 x 30 pixels. You can upload an image with different dimensions, but it will be resized to 30 x 30 pixels.
In the Main image position dropdown, select whether the image should be left, center, or right aligned.
Note: The Main image position dropdown is only visible for web chats with a position of bottom left or bottom right.
- Repeat steps 2–4 for Title image source and Footer image source.
- Click
 .
.
Setting the Web Chat Color
You can set the color for your web chat. This color is used for:
- The button that the customer clicks to start the web chat
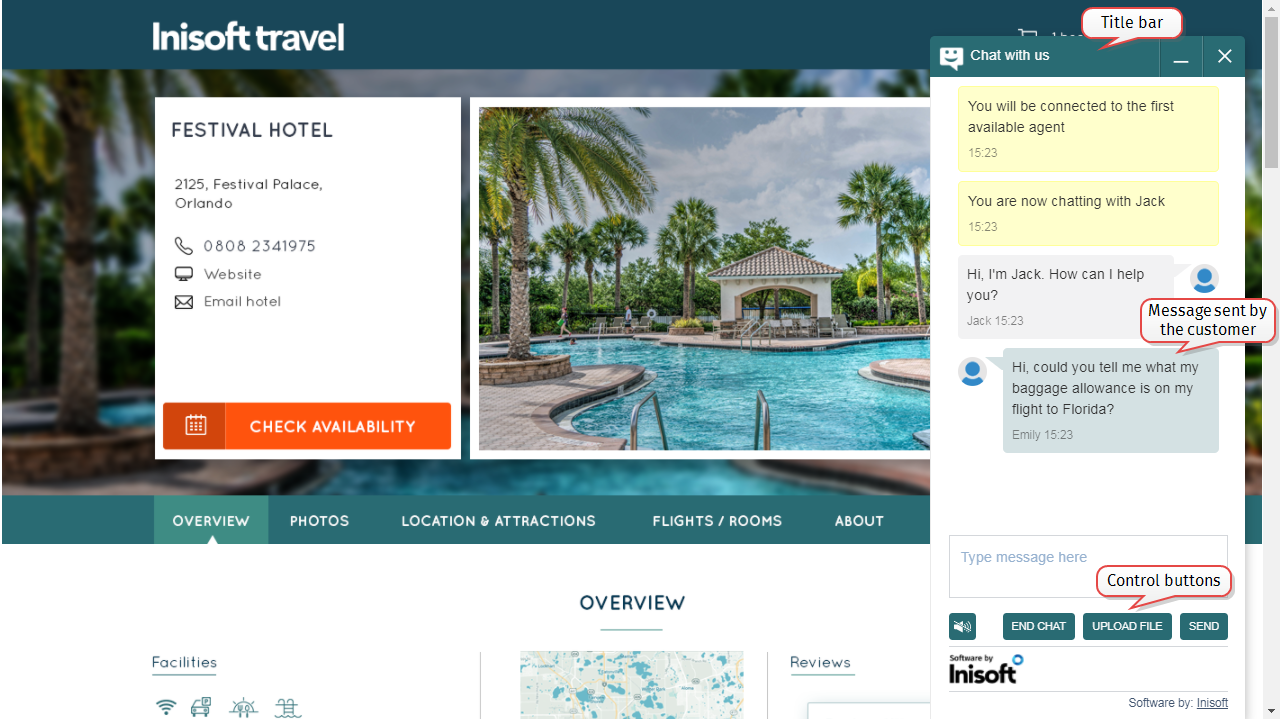
- The title bar
- The control buttons (for example, START CHAT and SEND)
- Customer messages
Note: An opacity of 0.2 is applied to the background color for customer messages.
To set the web chat color, follow these steps:
- From the Web Chat configuration home page, click VIEW for the web chat that you want to edit. The Web Chat page is shown.
- In the “Let’s Chat” options section, click
 . The fields are unlocked for editing.
 - Under Web Chat widget color, click Selected color. A box appears.
- Click the box and then select a color, or type the HEX color code if you know it.
- Click
 .
.
Setting the Text Color
You can set the text color for the web chat. This color is used for:
- The title
- The button text (for example, START CHAT and SEND)
Note: This color is not used for message text.
To set the text color, follow these steps:
- From the Web Chat configuration home page, click VIEW for the web chat that you want to edit. The Web Chat page is shown.
- In the “Let’s Chat” options section, click
 . The fields are unlocked for editing.
 - Click the Text color box and then select a color, or type the HEX color code if you know it.
- Click
 .
.
Advanced Styling
You can further customize the styling of your web chat using CSS (cascading style sheets).
Note: This is an advanced option. You should only use this option if you are familiar with CSS.
To add custom CSS to your web chat, follow these steps:
- From the Web Chat configuration home page, click VIEW for the web chat that you want to edit. The Web Chat page is shown.
- In the Web Chat details section, click
 . The fields are unlocked for editing.
 -
In the Custom CSS box, type your CSS. The following table shows the selectors that you can use.
Warning: Do not use any other selectors in the Custom CSS box. This could affect the styling of your website.
CSS selector HTML element #inisoftChatContainerdivfor the web chat plugin#inisoftWantToChatdivfor the web chat button (when web chat is closed)#inisoftLetsChatLogoimgfor the main image (when web chat is closed)#inisoftLetsChatLabelspanfor the title of your web chat (when web chat is closed)#inisoftChatHeaderdivfor the title bar (when web chat is open)#inisoftChatHeaderTitledivfor the image and text in the title bar (when web chat is open)#inisoftchatHeaderBtnsdivfor the minimize and close buttons in the title bar (when web chat is open)#inisoftChatClientContentdivfor the chat interface (when web chat is open) - Click
 .
.


