Customizing the Display Options
The Display options section of the Web Chat page lets you configure how your web chat is displayed (for example, is it always visible or does it only appear after a set number of seconds?).
Maybe you would like the topic to be automatically set based on the web page from which the customer starts the web chat, or for your web chat to only be visible on specific pages of your website. If so, this is where you configure that.
Note: You always need to have a display option for the Default URL. This is used for any web page that does not have its own display options.
Setting the Web Pages on Which Your Web Chat is Visible
EXAMPLE
Jack wants to configure a web chat for the Contact Center section of the Inisoft website (http://inisoft.com/contact-center). He doesn’t, however, want the web chat to be visible on other pages of the Inisoft website.
In the Root URL box of the Web Chat details section, Jack enters http://inisoft.com. In the Display options section, he:
- Edits the Default display option. For Display chat?, he clicks No.
- Adds a new display option. For Display chat?, he clicks Yes. For Apply display options to pages, he types /contact-center.
Displaying the Average Wait Time
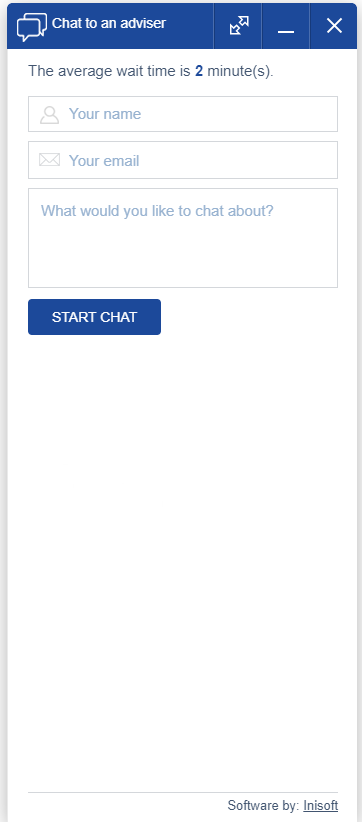
The average wait time can be displayed to the customer. The pre-chat survey has the option to display the average wait time other chat users have experienced in the last hour.
This information can be displayed anywhere on the pre-chat survey as per requirements. The calculation is automatically refreshed at regular intervals that you can set.
Below is an example of a customer’s view of the web chat that shows them the average wait time:

In addition, web chat queue information is available via the Webchat webAPI, which allows development teams to display an average wait time on their own websites if they want to promote web chat use. For example, on web-page banners inviting customers to try out the web chat.
Setting the Topic to Be Used for a Specific Web Page
To configure the topic to be used when a customer starts a web chat from a specific web page, follow these steps:
- From the Web Chat configuration home page, click VIEW for the web chat that you want to edit. The Web Chat page is shown.
- In the Display options section, click
 . The Display options page is shown.
 - Under Display chat?, click Yes.
-
In the Apply display options to pages box, type the path of the web page.
EXAMPLE
Jack wants a specific topic to be automatically selected when the customer starts a web chat from the Partners page of the Inisoft website (http://inisoft.com/contact-center/partners/). As such, in the Apply display options to pages box, he types /contact-center/partners/.
-
Under Topic, click Pick from an existing topic. A dropdown appears.
Note: If you instead click Let the customer pick the topic, the customer will be able to select from all the topics that you’ve added in the Available Web Chat topics section.
- In the dropdown, select the topic.
- Click
 .
.
Setting the Chat to Display Only after a Set Period of Time
You may only want the web chat button to become visible after the customer has spent a set amount of time on a web page.
EXAMPLE
Jack is configuring a web chat for the technical support section of his company’s website.
Jack doesn’t want the web chat button to appear immediately, as he would like customers to first skim through the Frequently Asked Questions section. This will help many customers to solve their problem themselves without having to contact an agent.
Jack configures his web chat to display after 30 seconds.
To configure your web chat to display only after a set period of time, follow these steps:
- From the Web Chat configuration home page, click VIEW for the web chat that you want to edit. The Web Chat page is shown.
- In the Display options section, click
 for the display option that you want to edit. The Display options page is shown.
 - Under Display after, click Display chat after a number of seconds. A box appears.
- In the box, type the number of seconds after which the web chat should be displayed.
- Click
 .
.
Setting the Chat to Automatically Open after a Set Period of Time
By default, the customer has to click the web chat button to open the web chat. If you wish, you can instead configure your web chat to open automatically after a set number of seconds.
EXAMPLE
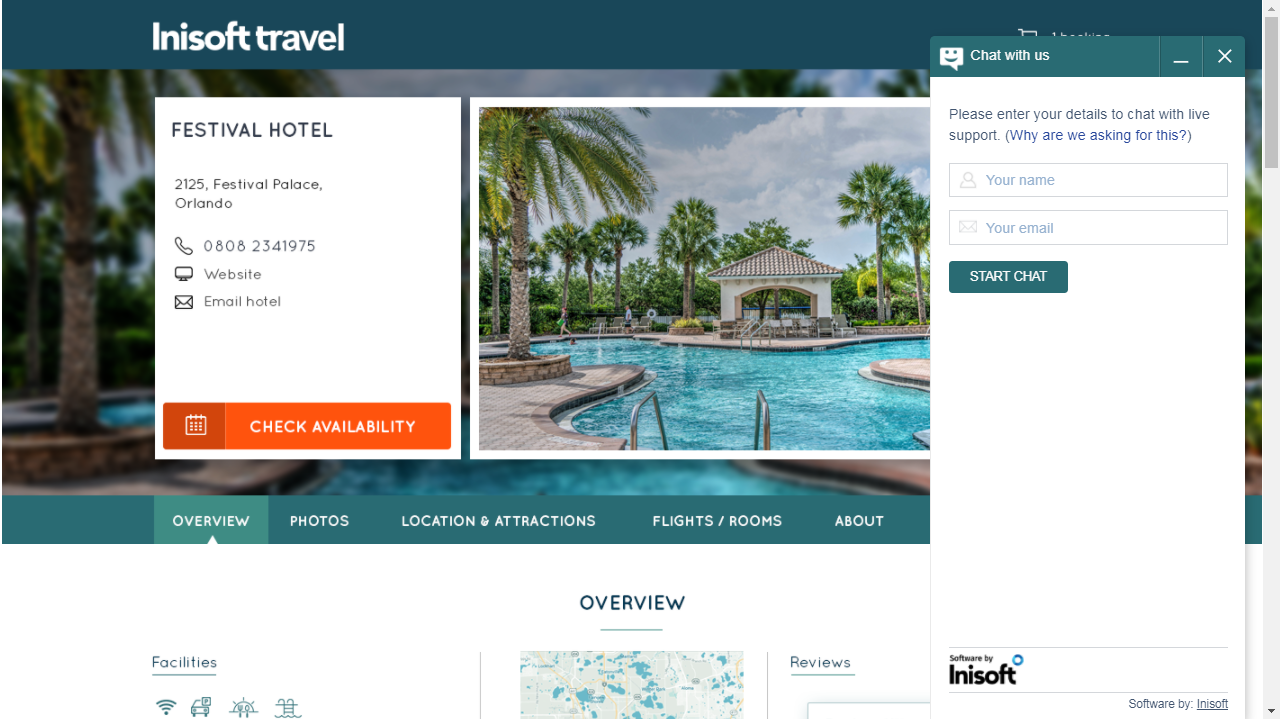
When a customer first visits the Inisoft Travel website, the web chat button is shown on the right-hand side.
If he wished, Jack at Inisoft Travel could configure the web chat to open automatically after, say, 30 seconds.
To configure your web chat to automatically open after a set period of time, follow these steps:
- From the Web Chat configuration home page, click VIEW for the web chat that you want to edit. The Web Chat page is shown.
- In the Display options section, click
 for the display option that you want to edit. The Display options page is shown.
 - Under Open after, click Automatically open Web Chat after a number of seconds. A box appears.
- In the box, type the number of seconds after which the web chat should automatically open.
- Click
 .
.
Disabling Chat on a Specific Web Page
EXAMPLE
Jack has configured his web chat to automatically use:
- The Inquiry topic when the customer starts the web chat from the Contact Us page
- The Technical Support topic when the customer starts the web chat from the Help page
The technical support staff have just gone into a training session, so Jack wants to disable web chat on the Help page but keep it active on the Contact Us page. He does this by configuring the display options for the Help page.
To disable web chat on a specific page, follow these steps:
- From the Web Chat configuration home page, click VIEW for the web chat that you want to edit. The Web Chat page is shown.
- In the Display options section, click
 for the display option that you want to edit. The Display options page is shown.
 - Under Display chat?, click No.
- Click
 .
.


