Designing a Script
Let’s add a simple script to our desktop.
A script tells agents what to say and do during a call. It also defines the different paths that each call can go down.

Adding a Script
With your desktop open in the Desktop Designer, click and drag a script control to the left-hand column of the container.

Viewing the Script
Click the cogwheel on the script and select Properties.
Create a new script called something like My First Script, and choose to edit it now.

A new tab will open in your browser, and an empty script will show.
You’ve now jumped from the Desktop Designer to the Script Designer.
Creating Your First Script Box
You may remember, back when we first talked about data entry elements, we said that they had other uses than just letting agents view and enter customer data. One of those uses is in scripts!
Let’s see that now. From the left-hand Controls menu, drag a data entry element to the Start box.

Click the cogwheel on this script box and select Properties.
Create a new data entry element called something like Outbound Greeting, and choose to edit it now.
You’ll jump from the Script Designer to the Data Entry Designer.
Next, follow these instructions:
- Add a 100% container to your data entry element.
- Add a text control (not a text box control!) to this container.
-
Set the Text property of this control to: Hi, is that [CONTACT.NAME_FIRST]?
At runtime, Syntelate XA will automatically insert the customer’s first name.
Tip: Use the dropdowns to insert the reference to the customer’s first name.

- Set the Text type of this control to Speech. This indicates that the agent should read out these words as is.
- Add a radio buttons control after the text control.
- Associate the radio buttons control with the CALL_TOUCH field in the INTERACTION_1 table.
-
Edit the optional Items property of the radio buttons control so that it looks as so:
Value Text Y Yes N No NO_ANS No answer VMAIL Voicemail Tip: The Text field is the radio buttons text that the agent sees in Syntelate XA. The Value field is what is written to the CALL_TOUCH field in the INTERACTION_1 table.
You could use any values here, so long as they’re distinct. In a moment we’ll reference these values from our script.
When you’re done, your data entry element should look like this:

Now click  to return to your script.
Expanding the Script
In our first script box, we’ve added four possible options. Either:
- The agent has got through to the right person.
- The agent has not got through to the right person.
- The customer did not pick up.
- The call has gone through to voicemail.
In our script, we now need to create branches for each of these four possibilities. This is done by defining exit conditions.
In the properties for the first script box, add four exit conditions as so:
| Condition name | Condition |
|---|---|
| Right-party contact | [INTERACTION_1.CALL_TOUCH] =='Y' |
| Incorrect-party contact | [INTERACTION_1.CALL_TOUCH] =='N' |
| No answer | [INTERACTION_1.CALL_TOUCH] =='NO_ANS' |
| Voicemail | [INTERACTION_1.CALL_TOUCH] =='VMAIL' |
The condition name shows in your script in the Designer and helps you to easily follow what’s going on. It won’t show to agents, so you can really enter whatever is most helpful for you.
The conditions here match up with the radio buttons that you added to the data entry element. To add conditions, you’ll use the Calculation Builder.

When you’ve added your four exit conditions, your script will look like this:

Further Expanding the Script
Hopefully you’re starting to get a feel for how scripts works in Syntelate XA. Now let’s work further on the right-party contact route.
Add a new data entry element that looks like this:
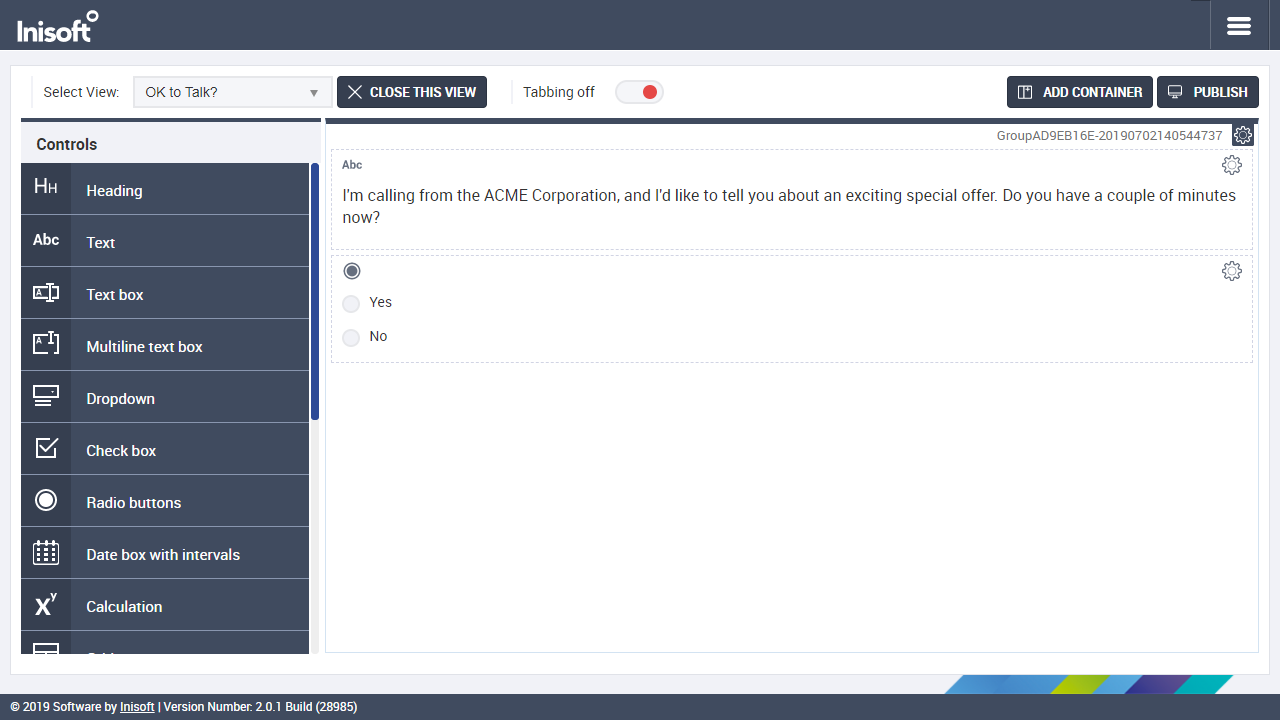
Link the radio buttons to field CALL_OK_TO_TALK in INTERACTION_1.
Add new exit conditions so that your script looks like this:

The Sale / No Sale Script Box
Add a new data entry element with two completion buttons that looks like this:

This time, for the text control, set the Text type property to Instruction. This indicates that the text is an instruction to the agent (rather than text to be read out to the customer).
Associate one completion button with the Sale (Converted) completion code and the other with the No Sale completion code.
Tip: Edit the Label property to change the text shown on a completion button.
To add a second completion button, click  at the bottom of the Control properties menu.
When you’re done, your script should look like this:

Finishing the Script
All right, let’s now quickly finish off our script. To cover all the other possible branches, we’ll create a single data entry element that lets the agent schedule a callback.
Drag this data entry element onto the Right-party contact > No box (although, for the record, you could really drag it onto any of the empty script boxes). The data entry element should look like this:

The middle control is a text box linked to field LKTL_RETRYAFTER in table INTERACTION_1. Set the Text box type property of this control to DateTime. This allows the agent to select a date and time via a date and time picker.
Set the Completion code property of the completion button to Call Back.
Your script will now look like this:

Now let’s make use of jump points!
Drag jump point controls to each of the remaining empty script boxes. For each jump point, set the Element to jump to property to the No exit condition.
Your finished script should look like this:

Testing the New Stuff
Phew!
Close your script and go back to the desktop. Publish it again to write the changes that you’ve made to runtime.
Now go back to runtime and test your script!

Try going through a number of different records, each time choosing a different path down the script.
Of course, this is a very simple script, but you should be getting an idea of what is possible in Syntelate XA.
In the next chapter, we’ll finish up by looking at some Other Features.