Designing a Data Entry Element
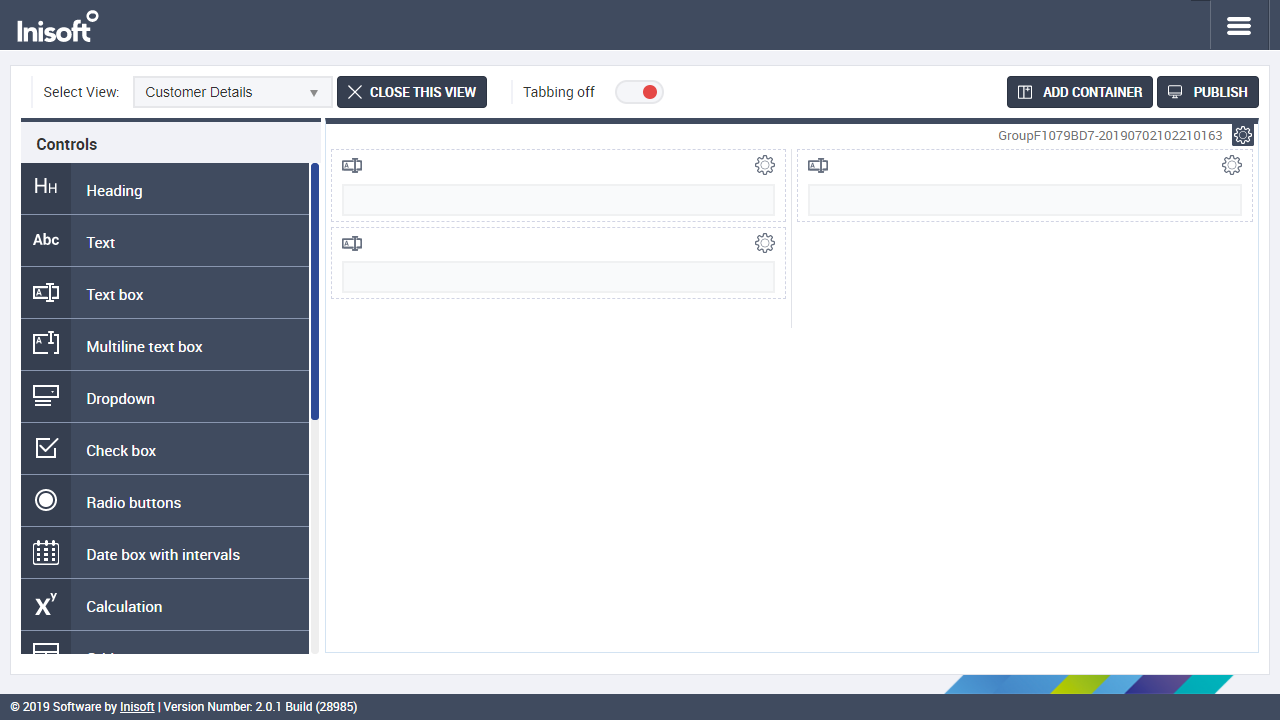
You’re looking at an empty data entry element. Let’s add some stuff to it!
Adding a Container
Just as with a desktop, the first thing we need to add to a data entry element is a container.
Remember, just click  at the top of the screen. This time, select a 50%–50% container.
Adding Text Boxes
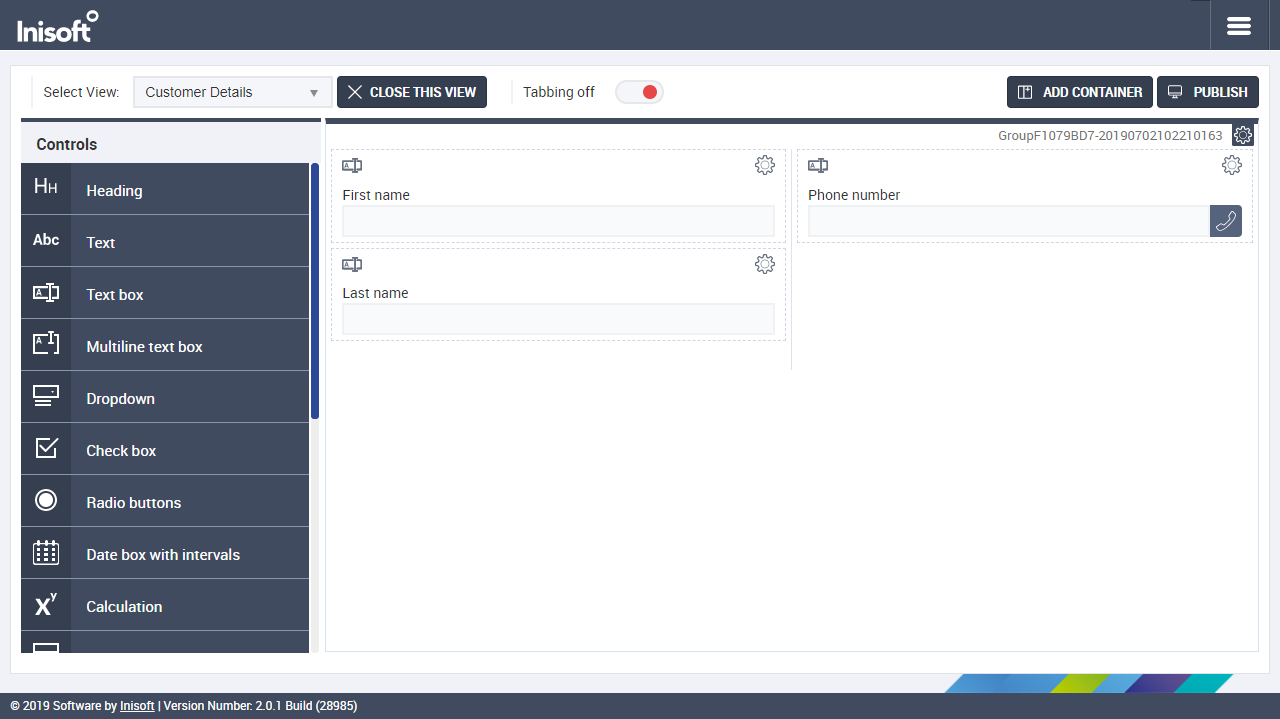
Now drag three text box controls (not text controls!) to your container so that it looks like this:
We’re going to use these text boxes to hold:
- The customer’s first name
- The customer’s surname
- The customer’s phone number
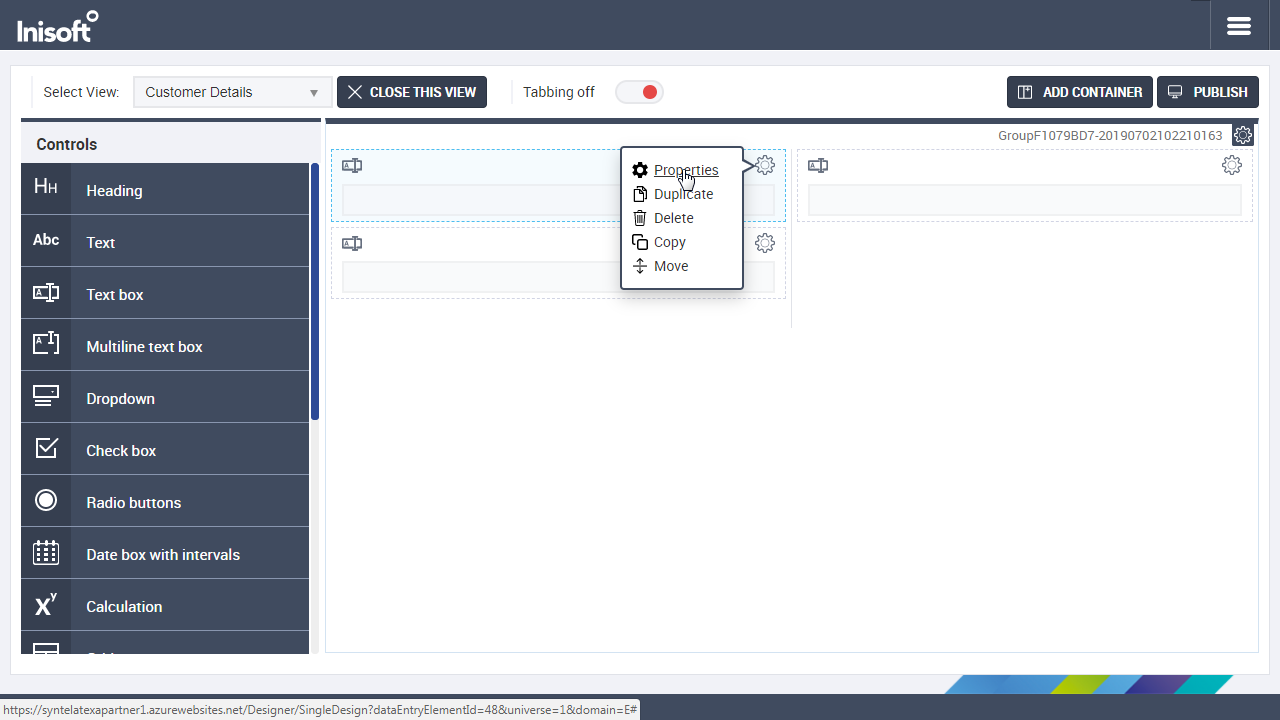
Let’s go! Click the cogwheel of the first text box and select Properties.
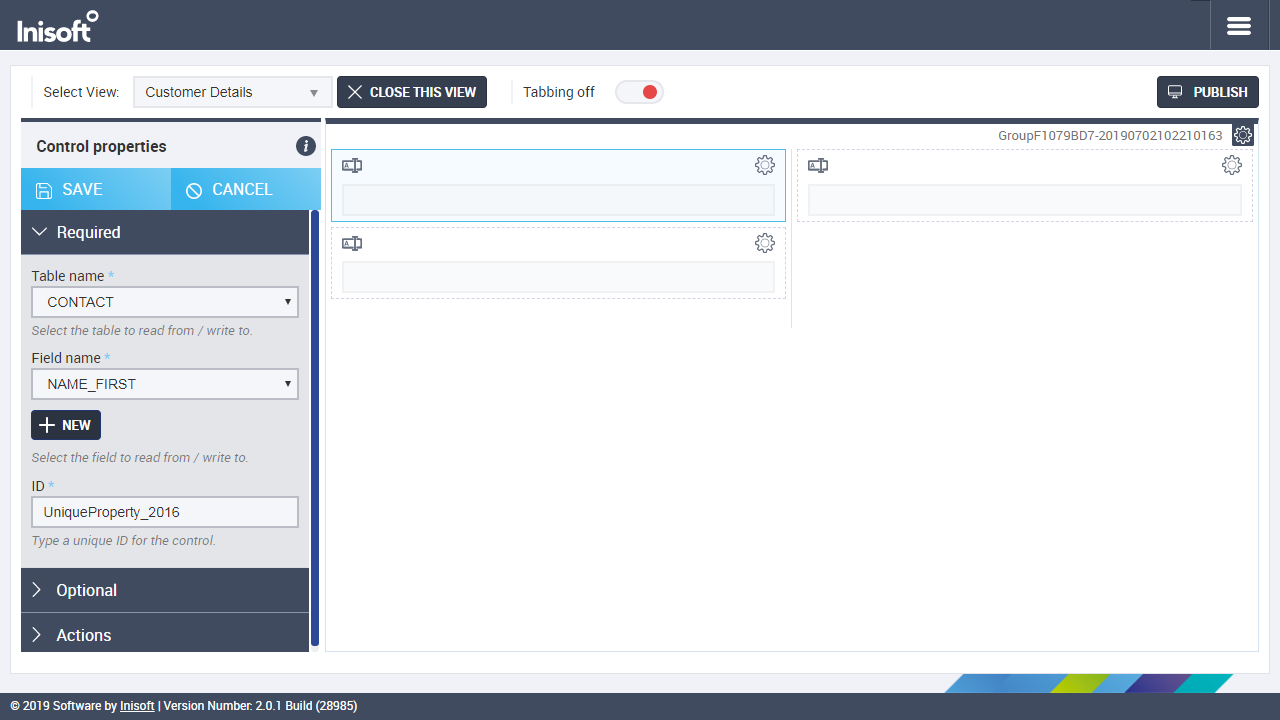
Just like in the Desktop Designer, the left-hand Controls menu is replaced by a Control properties menu.
The first two properties for a text box let you link the text box to a database field. All right, we’ve been putting it off, but now it’s time to say a little about universes.
About Universes
Syntelate XA lets you manage one or more data universes.
Think about it this way. Every company that uses Syntelate XA will need to store different kinds of data. For example, a retail company stores very different information about their customers than a bank.
A universe defines things such as the database tables that the agent desktop can access. If you use Syntelate XA with a separate customer relationship management (CRM) system, this is defined in the universe too.
The environment that you’re using with this tutorial has already been set up with a data universe called Agent Desktop, which has some database tables that you can use. You’re going to link your three text boxes to fields in the CONTACT table.
Note: If you’re following this tutorial on an environment that has not been specially set up to support your learning, the universe you’re using may not have a CONTACT table. Alternatively, it may have a CONTACT table but with different fields to those described below.
You’ll just have to proceed through the tutorial as best you can.
Editing the First Text Box
Back to where we were: the Control properties for the first text box.
In the Table name dropdown, select CONTACT. In the Field name dropdown, select NAME_FIRST. The ID field is automatically populated.
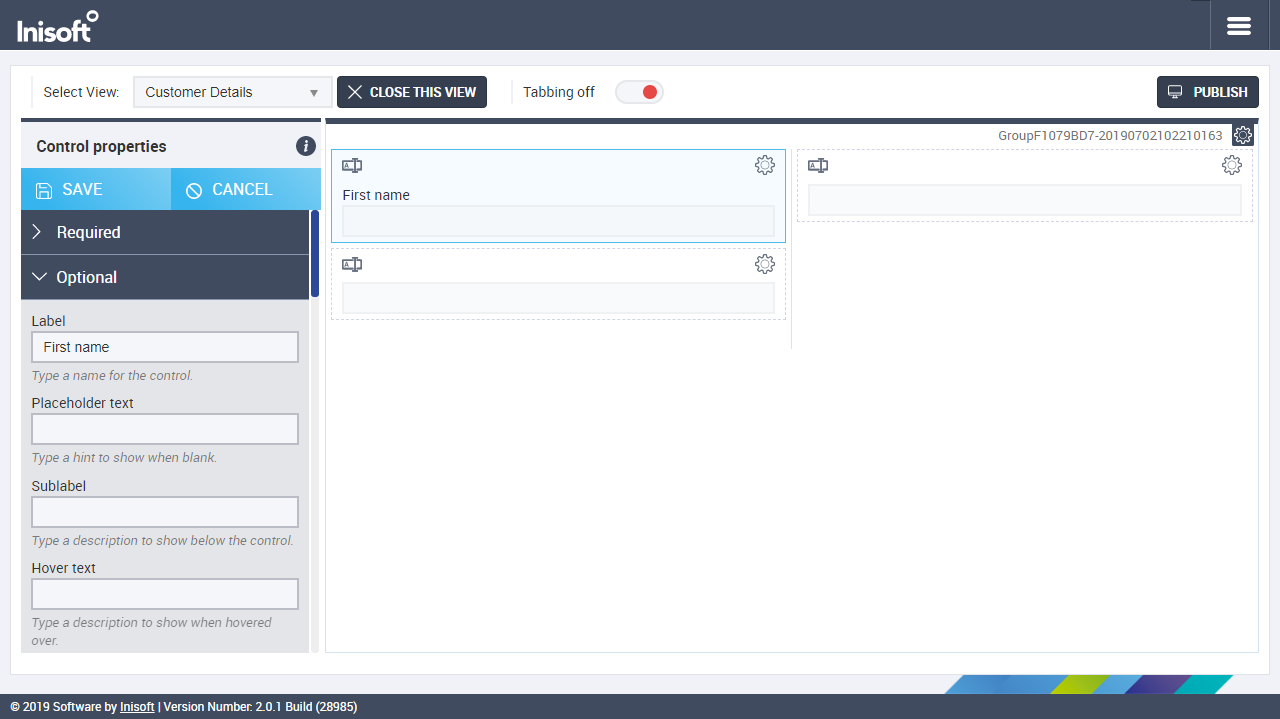
Next, click Optional to show additional properties.
In the Label box, type First name.
Last, click SAVE at the top of the Control properties menu.
Editing the Next Two Text Boxes
Next, edit the other two text boxes using these details:
| Table name | Field name | Label |
|---|---|---|
| CONTACT | NAME_LAST | Last name |
| INTERACTION_1 | LKTL_NEXTDIALNUMBER | Phone number |
In the optional properties for the phone number text box, set the Text box type to PhoneNumber and set Dial on click? to Yes.
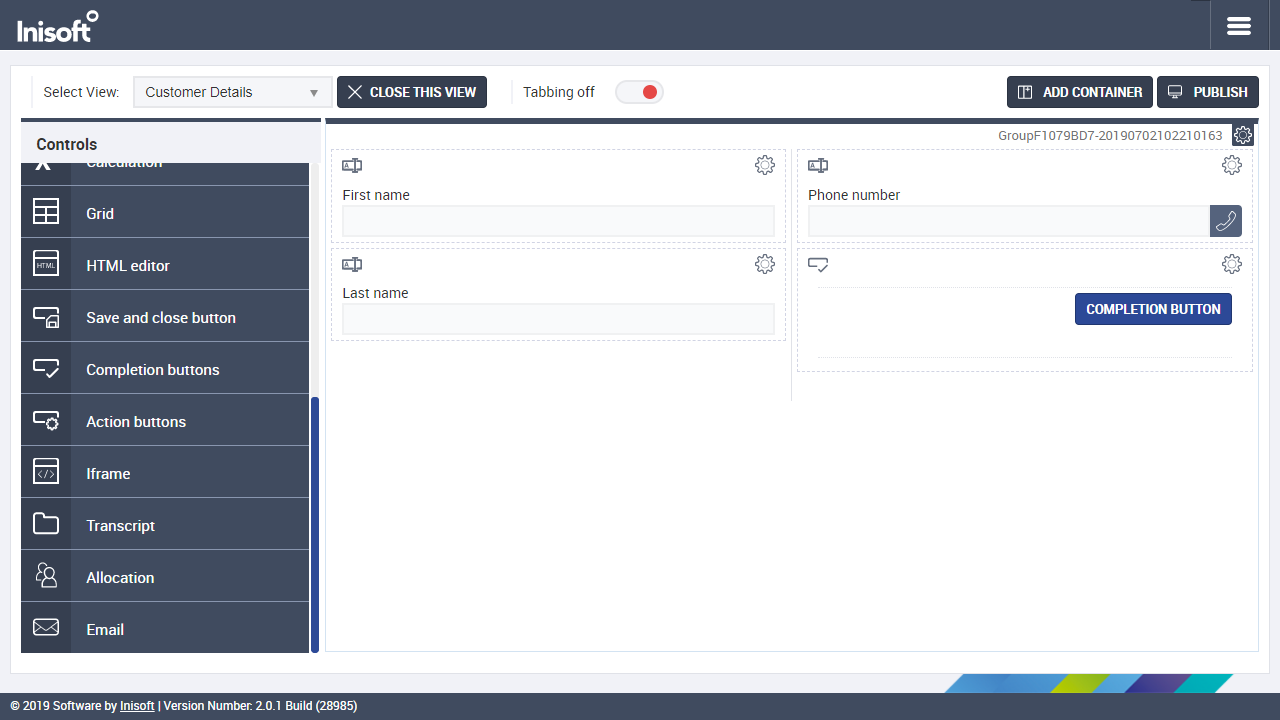
When you’re done, your desktop should look like this:
Adding a Completion Button
You’ve now been working in Designer for a while, so it’d be nice to take a look at your desktop as your agents will see it. This should help to put into context all the stuff that you’ve been doing.
We’ll do that soon, but first there’s one more thing you need to add to your desktop: a completion button.
When an agent has finished speaking with a customer and has finished updating the customer’s record, the agent clicks a completion button. This closes the customer’s record and makes the agent available to be passed another call. You always need to include at least one completion button on an agent desktop.
OK, drag a completion buttons control under the phone number as so:
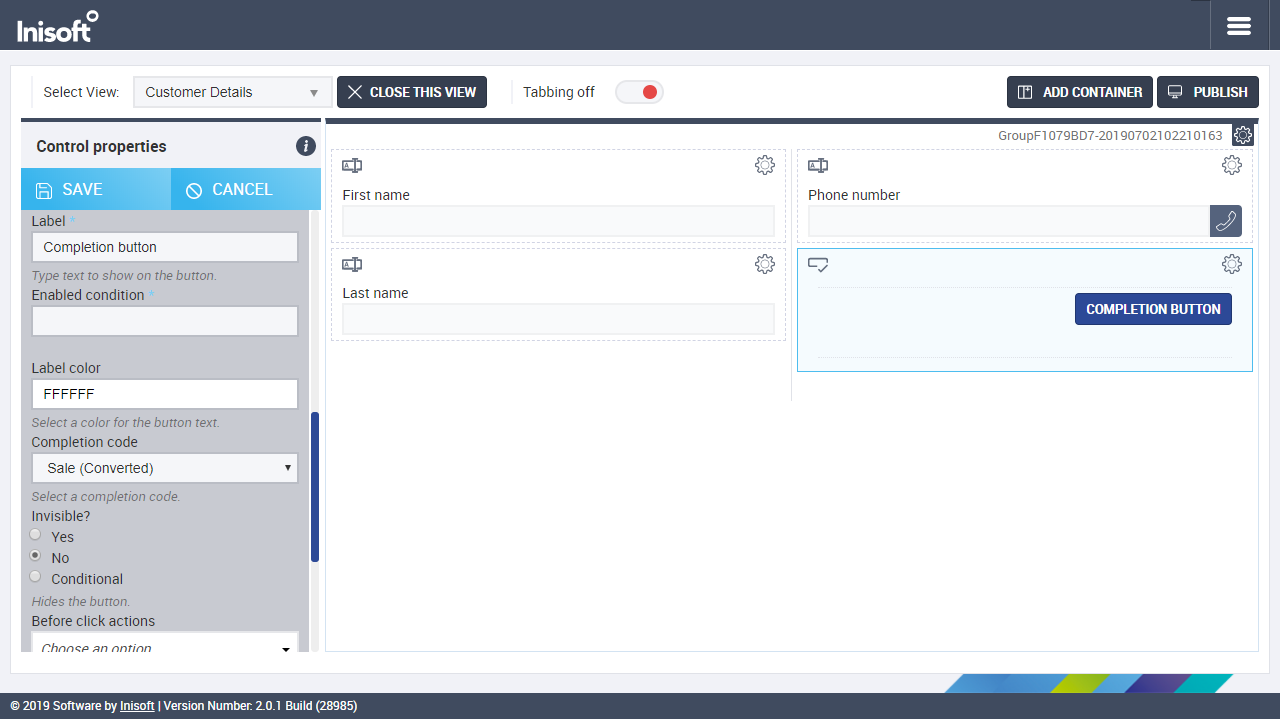
Just as with a text box, you can edit the properties of a completion buttons control. Do this, and edit the Completion code optional property to Sale (Converted). Click SAVE.
Note: If you’re following this tutorial on an environment that has not been specially set up to support your learning, the Sale (Converted) completion code may not be available. If that’s the case, you’ll just have to use a different completion code.
Closing the Data Entry Element
Next, click  . The tab in your browser will close, and you’ll see the Desktop Designer again.
Note: If you’re following this tutorial on an environment that has not been specially set up to support your learning, you’ll need to take an extra step here.
Drag a menu control onto your desktop, to the left-hand (25%) container. Edit the control’s properties to give it a title like Record creator. Under Items, set Item to Interaction record and Title to New record.
In the Desktop Designer, click SAVE in the Control properties menu to close it, and then click  to close the desktop too.
In the next chapter, we’ll quickly go through Updating Your Workzone. That’s the last thing we need to do before we can test your desktop as your agents will see it.

